

Creating a cozy ambiance in your apartment, whether it be in the bedroom, bathroom, or living room, is beautifully enhanced by the glow and fragrance of candles. These small flames can turn your living space into a warm haven, perfect for pets and their owners alike.
However, participating in this cozy lifestyle can come at a high cost. Many of the candle brands available today carry price tags that could surprise you, sometimes even reaching into the hundreds of dollars. This can be especially frustrating when you're looking for that perfect fragrance blend that truly resonates with you.
If you reside in pet-friendly communities that value creativity and relaxation, such as those in San Antonio, Texas, why not take matters into your own hands? By making your own scented candles, you not only cut costs but also pick up a creative and rewarding hobby.
Follow these steps to craft your own scented candles from the comfort of your apartment at The View at Westover Hills.
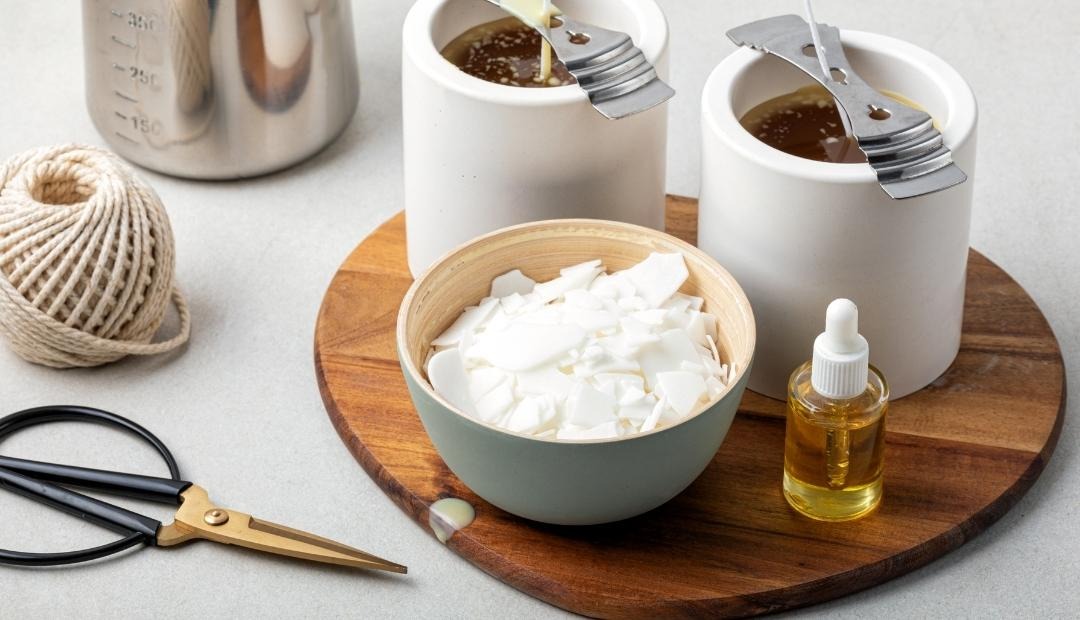
What You'll Need
Tools
- Pot
- Heat-proof bowl or measuring jug
- Weighing scale
- Spatula
- Wick holder or chopsticks
- Candy thermometer
Materials
- Wax (options include paraffin-soy blend, soy, or paraffin)
- Cotton wicks
- Hot glue or wick stickers
- Heat-proof candle container such as a glass jar, tin, or candle mold
- Fragrance oil
- Dye (optional)
- Small glass containers for the fragrance oil and dye
- Paper towels
Instructions
1. Measure Your Wax
Place a jug or bowl on a weighing scale and tare the scale. Gradually add solid wax until you reach the desired candle weight, making sure it fits your chosen container. For instance, use 1-ounce wax for a 1-fluid ounce jar.
2. Melt the Wax
Place a pot on the stove, fill it halfway with water, and bring it to a simmer. Put the wax-filled jug or bowl into the pot, letting the wax melt over time. Stir occasionally to ensure even melting.
3. Prepare Your Container
While waiting for the wax to melt, start preparing your container and wick. Ensure every part of the process fits smoothly into your apartment lifestyle. Wash your container with soap and water, wipe it dry with a paper towel, and place it on a flat surface. If using multiple jars or tins, keep them a few inches apart to avoid spillage.
4. Secure the Wick
Using hot glue or a wicker sticker, secure the bottom of the wick tab. Push this end of the wick to the center of your container, holding it in place until the glue dries. A wick holder is handy for centering and securing the wick, but in its absence, a pair of chopsticks can substitute efficiently.
5. Add the Fragrance and Color
Weigh out the recommended amount of fragrance oil and dye, each in its own small glass container. Use a candy thermometer to steady the wax temperature. Once it reaches 175°F, add the fragrance oil and stir for a few minutes.
6. Pour the Wax
Check the wax's temperature again, ensuring it's around 130°F before starting to pour it into your container. Carefully use a spatula to pour the wax toward the center, allowing it to flow naturally outward. Ensure the wick remains centered as the wax cools.
7. Trim the Wick
Allow the wax to set completely over 24 hours before trimming the wick to size. Then, you’re ready to enjoy the delectable scent and ambiance created by your DIY candle, perfect for your pet-friendly life at The View at Westover Hills.
Why Choose The View at Westover Hills in San Antonio?
With a range of 1 to 3 bedroom apartment options and amenities like a resort-style swimming pool, state-of-the-art fitness center, and even a community bark park, The View at Westover Hills embraces a community conducive to comfort and relaxation. The apartments are thoughtfully designed with features like granite countertops and full-sized washers/dryers, all contributing to an elevated living experience. Located in the vibrant city of San Antonio, you can immerse yourself in a lifestyle that values quality and harmony both for you and your pet companions.